Lesson #4 Calculating How Much Rya Yarn You Will Need
Hi, Friends
In lesson #3, we marked all the color areas on the graph paper with a corresponding yarn blending number which we also tied to our threading card for reference, like a paint by number painting. (Oh no, don’t glaze over yet!) To determine the amount of yarn we’ll need, first let’s do it mathematically so we know the ballpark amount. This technique is really easy, and I can in a moment tell you how much yarn any given backing will require by multiplying the number of knots that can be made across a horizontal row times the number of rows in the rug.
With this Monet’s Bridge design, I have hemmed two (2) 34″ wide rayon and linen backings which each can hold 84 knots across the row. 84 x 2 = 168 knots across the row. In this backing there are about 21 rows per foot and this is a 4-foot tall rug, I happened to hem the backing in a way that allows for 82 knotable rows. So our graph is designed to be 168 knots x 82 rows. (Calculator, please.) 168 x 82 = 13,776 knots in the entire rya.
With this number, you can figure out lots of information.
- If you make 150 knots per hour, it will take you 91 hours to knot a rya this size
- If you make a loop (pile) that is about 1 1/2″ long, you will get about 325 knots from a skein. 13,776 knots divided by 325 knots per skein = 43 skeins needed for this 4′ x 6 ‘ rya.
- If you wanted a 2″ long pile, you would get about 300 knots from a skein. So how many skeins would YOU need to knot a 4′ x 6′ rya? Calculators welcome.
- If you don’t like complicated stuff, and you hate math, you could simply say, “OK, my rug needs 43 skeins of yarn, I will order a mixed bag of the colors I need–maybe only 30 skeins, then I’ll see what I run out of, and order more of that at that time.” I am fine with that. It gets you started, and by the time you need more yarn, you’ll have a good idea of future needs.
If this doesn’t really interest you, don’t bother reading any further! But if you are one of the many folks who has asked for this and can not wait for my illustrated book to come out, brace yourself…. here comes the real math with no apologies.

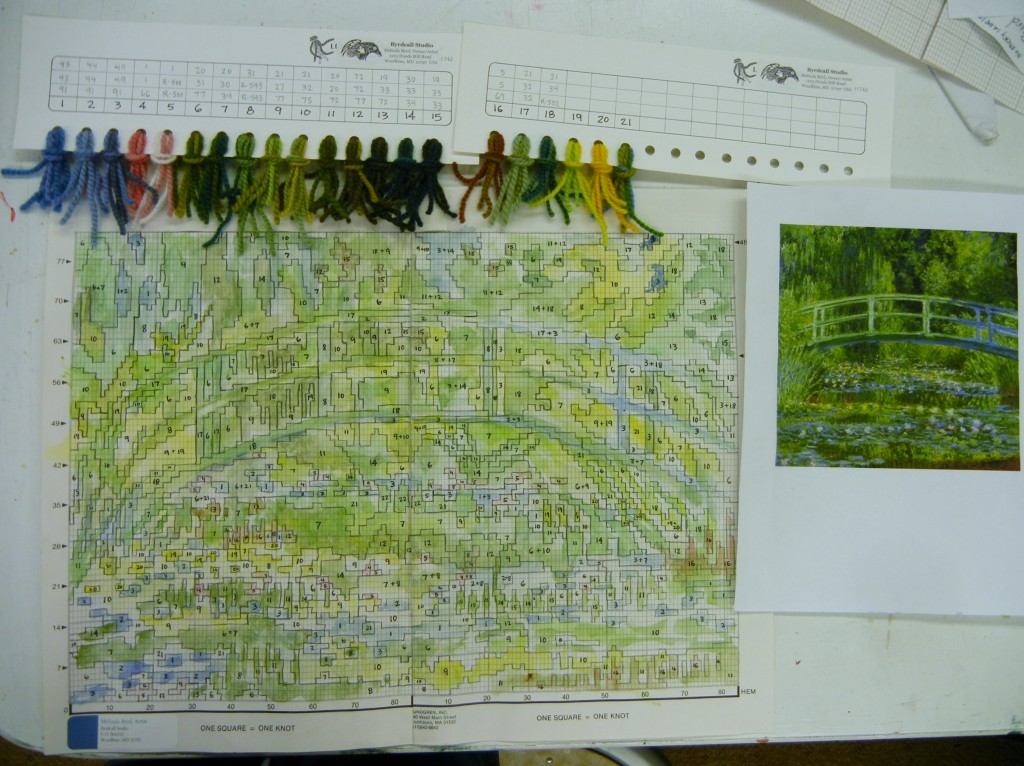
Here is the threading card to show color combinations matched with a number to go on the graph.
For each color combination threading you have created on your threading card, count–or estimate–the number of knots in your rug of each of those color combinations. I usually count by 10’s or square inches on the graph which have 70 knots.

Worksheet for tallying knot counts and math to determine how much of each color Part I.
Now I agree, that is a lot of counting and numbers. Now we’ll make sense of them. The last column on the right (below) tell us how many skeins of each pure color we need to order to make our Monet rug. Notice only 1/4 skein is needed in certain lesser-used colors. Lots of 1/2 skeins. As my grandparents did, I also am happy to split skeins for rya rug makers. It can save you a lot of money to only buy 1/4 instead of a full skein of every color.

There may be easier ways to do this, but I don’t know what they are. This actually works and doesn’t take as long as you probably think it does.

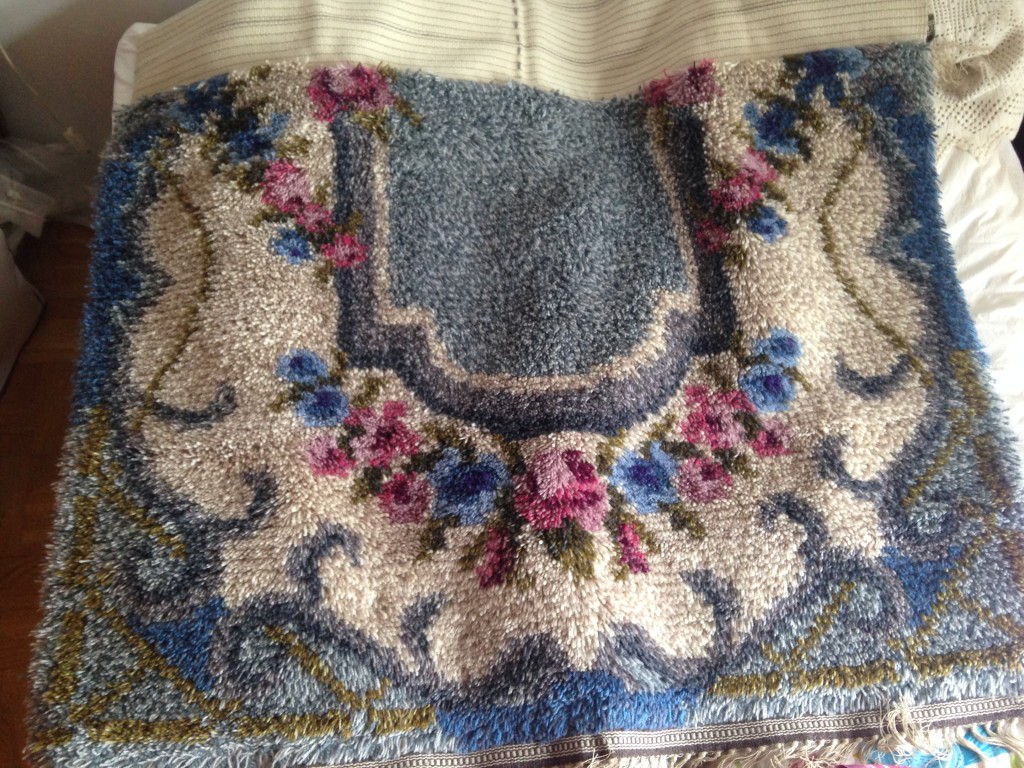
I pulled all the yarn from the storage shelves for making this rug. Here is what the pile of supplies looks like. So now, all that is left is to have Bill stop by to reacquaint himself with rya rug making, give him a mini-lesson until he feels totally comfortable with the project that will take him about 90+ hours, then home he goes to work on his rya at his leisure. I can’t wait to see the design become reality. I’m sure Claude Monet is thrilled too.
PS. As I was writing this all down for you I was a little mortified that I had chosen such a detailed design with which to explain the yarn calculations. I’ll go with a more basic design next time. My book will have it MUCH more basic to start, but this degree of difficulty is good to know if you want to design your own from paintings for example.
Questions? This is a good place to ask.


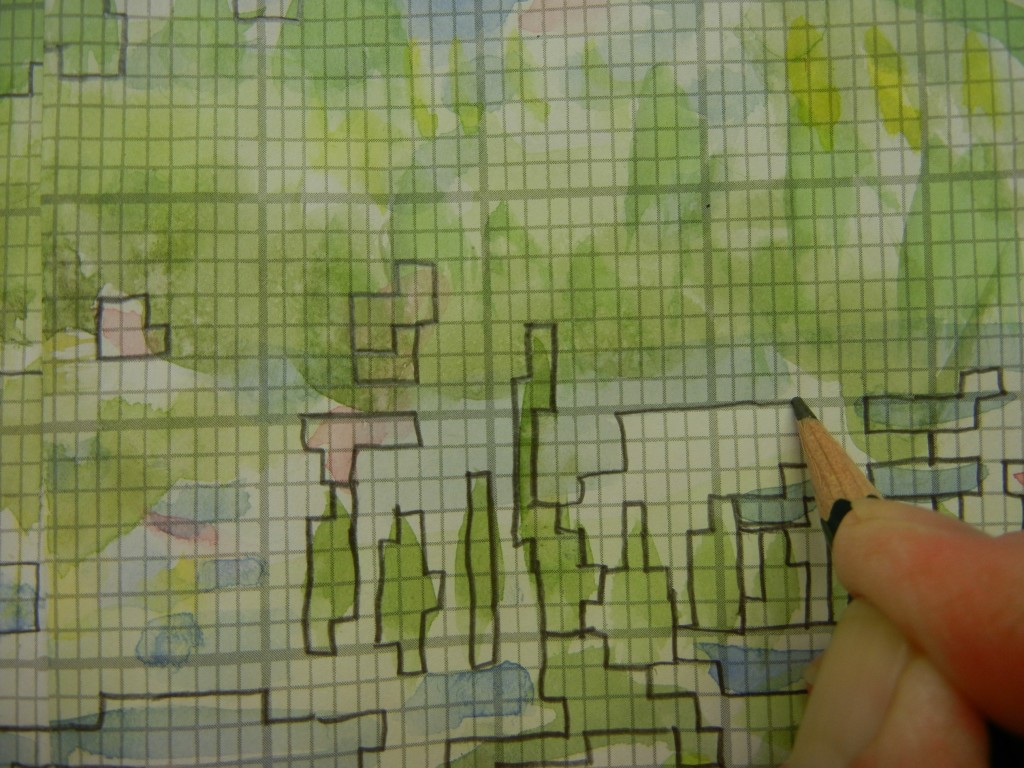

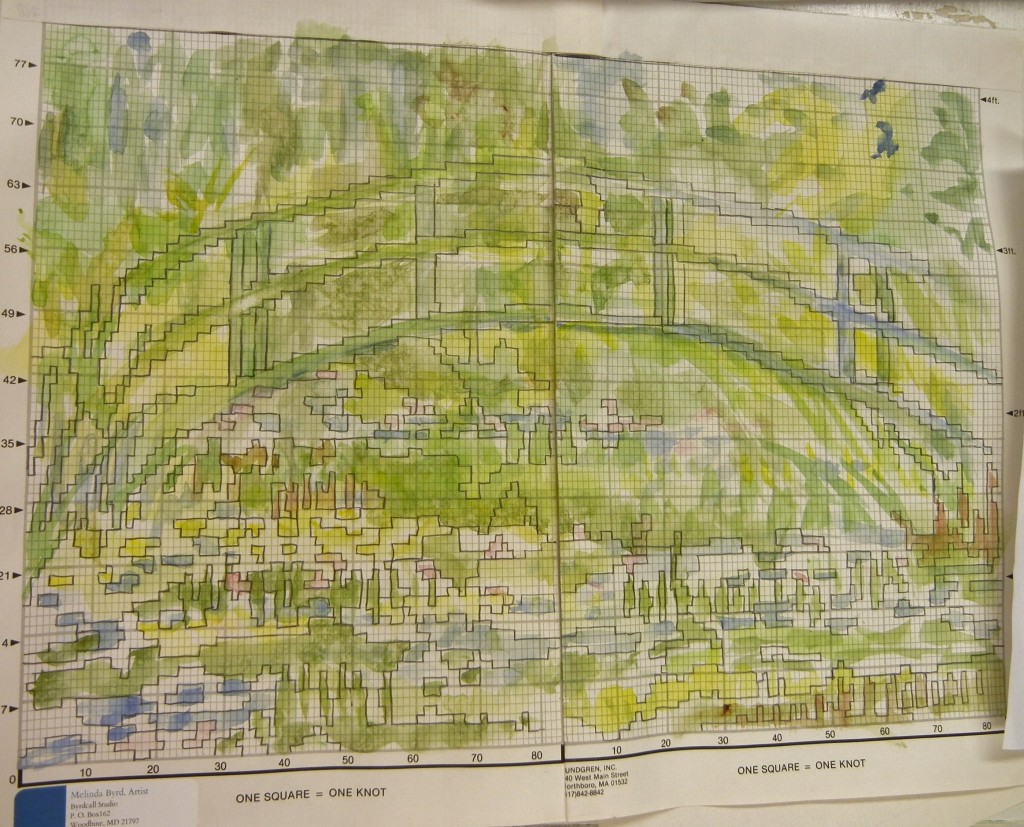 I will leave you today with this image as I walked away from it this evening. It is more than half squared off. In the next work session, I’ll show you how I make a corresponding color card showing exactly what color yarn will go where. Any questions?